mini project วัดความกดอากาศและความสูงแสดงผลทางจอLCD
Arduino Barometer Project Using BMP180

Pressure sensors are widely used in drones, weather stations, smartphones and more. It is important to know how this small piece of technology works.
We are going to be using the BPM180 sensor. The name of the module is GY-68. The small device can read, pressure, altitude, and temperature.
Let’s build a small device that uses BPM180 to read pressure and altitude and uses an I2C LCD display to show that information (You can as well choose to display it on the serial port).

Here are the components we need:
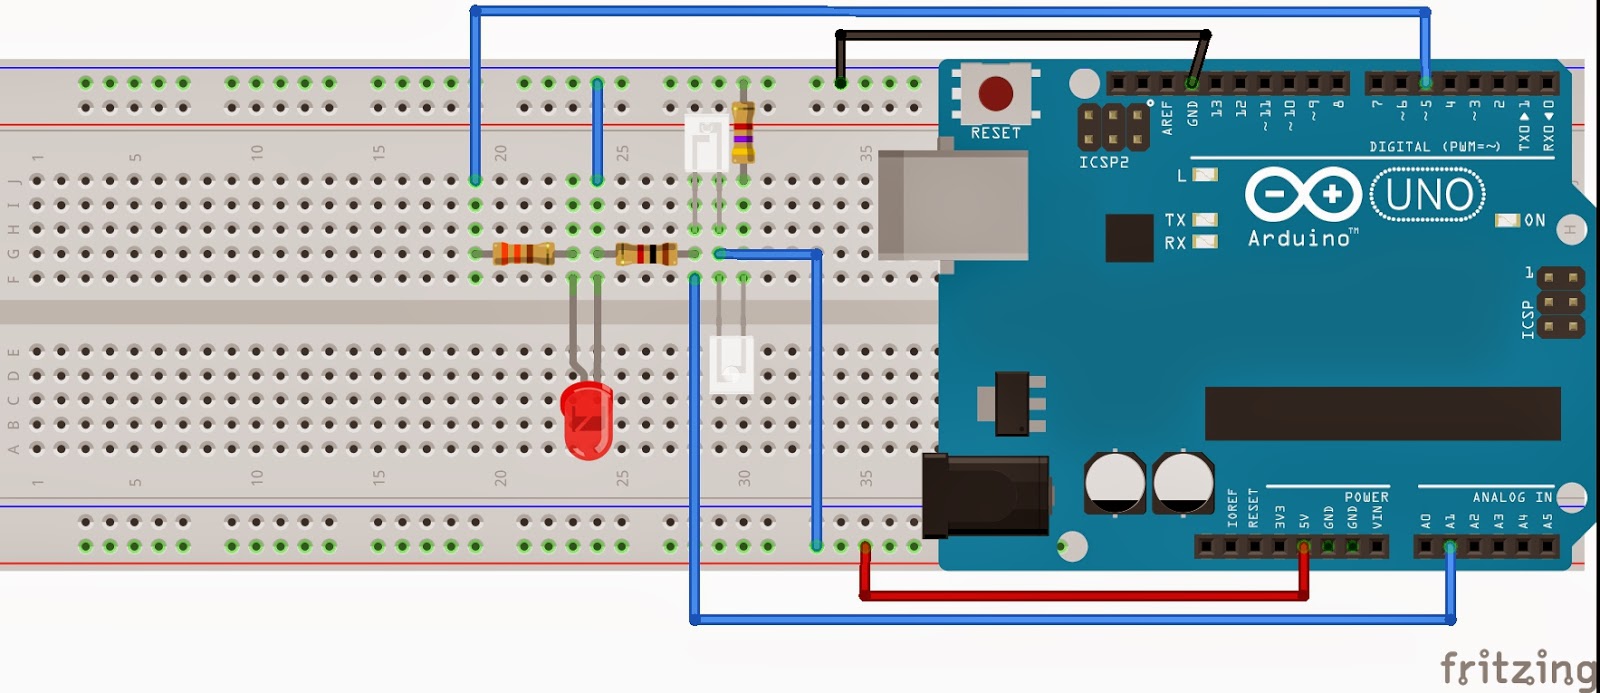
As usual, we need to do the connection before uploading the sketch into the board.
Because both the LCD and the pressure sensor use the I2C, we have to connect the pins SDA and SCL to the analog pins 4 and 5.

Some barometers have a Vin pin and some a 3V3 pin. If yours has a Vin, it should be connected to 5V and if it does have 3V3 it should be connected to 3.3V.

After connecting the component together, we need to upload the following code to the Arduino board. We need additional libraries, one of them is the Adafruit_BMP085.h. You should be wondering the reason why it says BMP085 while we are using the sensor BMP180. Do not worry, this library should work with this sensor as well.
If you don’t know how to add libraries, I will suggest you check this to learn how to add libraries to your sketches. This code will display pressure and altitude on the LCD. You can also display temperature if you have bigger LCD, on my one (16×2) there was no space for that. To display text in two lines we use setCursor() function.
Note, you can use this same setup to display temperature.
1
2
3
4
5
6
7
8
9
10
11
12
13
14
15
16
17
18
19
20
21
22
23
24
25
26
27
28
29
30
31
32
33
34
35
36
37
38
39
40
41
42
| #include <Wire.h>#include <Adafruit_BMP085.h>#include <Wire.h> #include <LiquidCrystal_I2C.h>LiquidCrystal_I2C lcd(0x27,20,4);Adafruit_BMP085 bmp; void setup() { lcd.init(); lcd.backlight(); if (!bmp.begin()) { lcd.print("ERROR, check wiring!"); while (1) {} } lcd.print(" tutorial45.com"); delay(3000); lcd.clear();} void loop() {/* * this sensor is very powerful, you can even read * temperature with it with this function: * bmp.readTemperature() */ //read pressure lcd.setCursor(0, 0); lcd.print("P: "); lcd.print(bmp.readPressure()/100); lcd.print(" hPa"); //read altitude lcd.setCursor(0, 1); lcd.print("A: "); lcd.print(bmp.readAltitude()); lcd.print(" m"); delay(1000);} |
The code helps capture pressure and altitude from the pressure sensor and display it on the LCD. It displays pressure in hPa and altitude in meter.


ความคิดเห็น
แสดงความคิดเห็น